The graphical modeler
Il modellatore grafico consente di creare modelli complessi mediante un’interfaccia semplice e facile. Quando lavorate con un GIS, molte operazioni di analisi non sono isolate, ma inserite in una catena di operazioni. Mediante il modellatore grafico questa catena di processi può essere combinata in un solo processo; in questo modo è più facile e conveniente eseguirlo come singolo processo invece di successivi processi basati su differenti dataset di input. Indipendentemente dal numero di passaggi e dai differenti algoritmi coinvolti, esso è eseguito come un singolo algoritmo, risparmiando quindi tempo e fatica, specialmente nel caso di modelli di grandi dimensioni.
The modeler can be opened from the processing menu.
Il modellatore ha un’area grafica di lavoro dove sono visualizzati la struttura del modello ed il flusso delle operazioni che lo rappresenta. Si può usare un pannello con due riquadri sulla sinistra della finestra per aggiungere nuovi elementi al modello.
Figure Processing 16:

Modeler 
La creazione di un modello comporta due passaggi:
- Definition of necessary inputs. These inputs will be added to the parameters window, so the user can set their values when executing the model. The model itself is an algorithm, so the parameters window is generated automatically as it happens with all the algorithms available in the processign framework.
- Definition of the workflow. Using the input data of the model, the workflow is defined adding algorithms and selecting how they use those inputs or the outputs generated by other algorithms already in the model
Definizione dei dati di ingresso
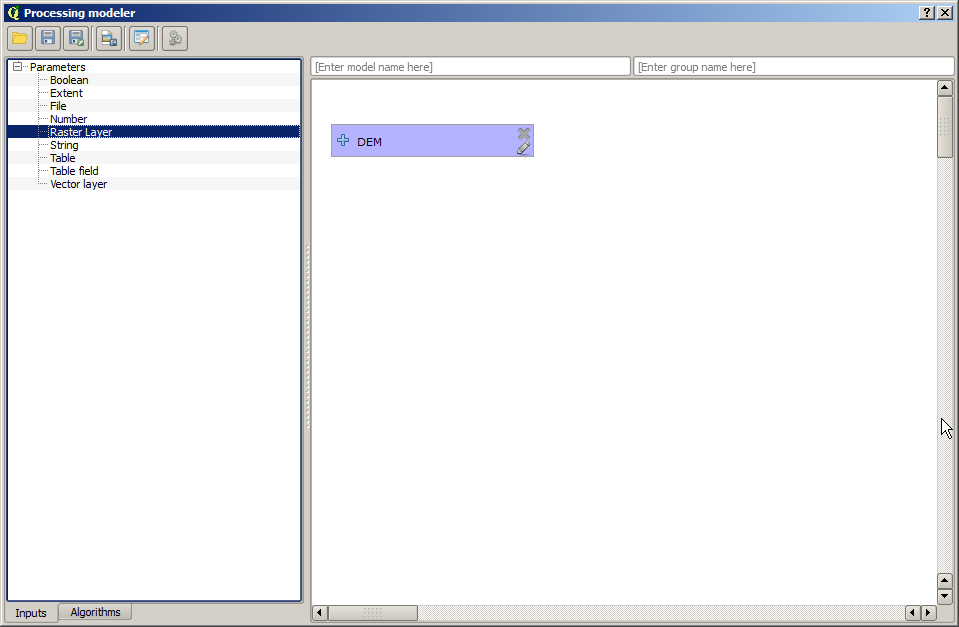
The first step to create a model is to define the inputs it needs. The following elements are found in the Inputs tab on the left side of the modeler window:
Layer raster
Layer vettoriali
Stringhe di testo
Campi di tabelle
Tabelle
- Extent
- Number
- Boolean
- File
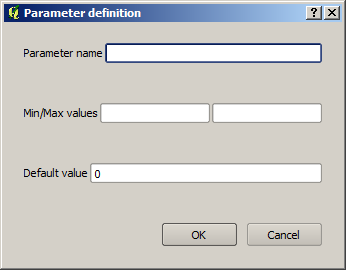
Premendo due volte con il mouse su uno di questi elementi, apparirà una finestra di dialogo per definire le sue caratteristiche. A seconda del parametro stesso, la finestra conterrà un solo elemento (la descrizione che è quello che l’utente vede durante l’esecuzione del modello) o più elementi. Ad esempio, aggiungendo un valore numerico, come si può vedere nella figura seguente, oltre alla descrizione del parametro, dovrete definire un valore di partenza ed un intervallo di valori validi.
Figure Processing 17:
Model Parameters
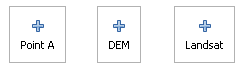
Per ogni dato di ingresso aggiunto, appare un nuovo elemento nel pannello grafico del modellatore.
Figure Processing 18:
Model Parameters
Definizione del flusso operativo
Una volta definiti i dati ingresso, occorre decidere gli algoritmi da applicare ad essi. Gli algoritmi si trovano nella casella Algoritmi, raggruppati allo stesso modo come nella cassetta degli attrezzi.
Figure Processing 19:
Model Parameters
The appearance of the toolbox has two modes here as well: simplified and advanced. However, there is no element to switch between views in the modeler, and you have to do it in the toolbox. The mode that is selected in the toolbox is the one that will be used for the list of algorithms in the modeler.
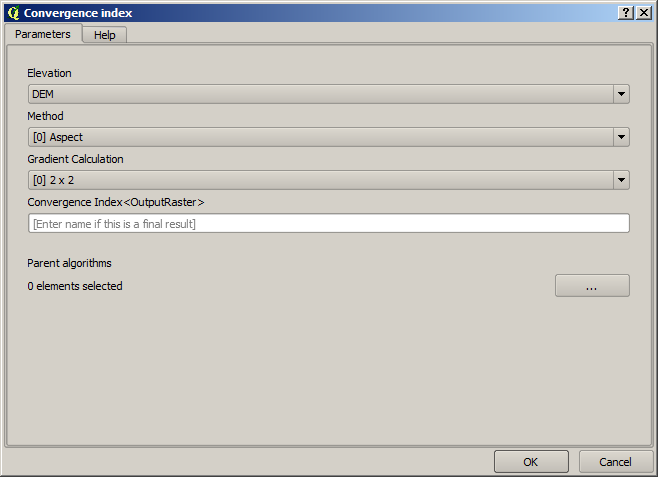
To add an algorithm to a model, double-click on its name. An execution dialog will appear, with a content similar to the one found in the execution panel that is shown when executing the algorithm from the toolbox. The one shown next correspond to the SAGA ‘Convergence index’ algorithm, the same one we saw in the section dedicated to the toolbox.
Figure Processing 20:
Model Parameters
As you can see, some differences exist. Instead of the file output box that was used to set the filepath for output layers and tables, a simple text box is. If the layer generated by the algorithm is just a temporary result that will be used as the input of another algorithm and should not be kept as a final result, just do not edit that text box. Typing anything on it means that the result is a final one, and the text that you supply will be the description for the output, which will be the one the user will see when executing the model.
Selecting the value of each parameter is also a bit different, since there are important differences between the context of the modeler and the toolbox one. Let’s see how to introduce the values for each type of parameter.
- Layers (raster and vector) and tables. They are selected from a list, but in this case the possible values are not the layers or tables currently loaded in QGIS, but the list of model inputs of the corresponding type, or other layers or tables generated by algorithms already added to the model.
- Numerical values. Literal values can be introduced directly on the text box. But this text box is also a list that can be used to select any of the numerical value inputs of the model. In this case, the parameter will take the value introduced by the user when executing the model.
Stringhe. Come nel caso dei valori numerici, si possono inserire stringhe o selezionarle (da un elenco).
- Table field. The fields of the parent table or layer cannot be known at design-time, since they depend of the selection of the user each time the model is executed. To set the value for this parameter, type the name of a field directly in the text box, or use the list to select a table field input already added to the model. The validity of the selected field will be checked at run-time.
In all cases, you will find an additional parameter named Parent algorithms that is not available when calling the algorithm from the toolbox. This parameter allows you to define the order in which algorithms are executed, by explicitly defining one algorithm as a parent of the current one, which will force it to be executed before it.
When you use the output of a previous algorithm as the input of your algorithm, that implicitly sets the former as parent of the current one (and places the corresponding arrow in the modeler canvas). However, in some cases an algorithm might depend on another one even if it does not use any output object from it (for instance, and algorithm that executes an SQL sentence on a PostGIS database and another one which imports a layer into that same database) In that case, just select it in the Parent algorithms parameter and they will be executed in the correct order.
Una volta assegnati valori corretti a tutti i parametri, premete [OK] e l’algoritmo sarà aggiunto al pannello grafico. Sarà collegato a tutti gli altri elementi del pannello, sia algoritmi sia dati, che forniscono oggetti usati dall’algoritmo come dati di ingresso.
Figure Processing 21:

Model Parameters
Gli elementi possono essere spostati nel pannello grafico per modificare la visualizzazione della struttura del modello e renderla più chiara ed intuitiva. I collegamenti fra gli elementi vengono aggiornati automaticamente.
Potete eseguire il vostro algoritmo in ogni momento premendo il pulsante [Run]. Tuttavia, per poterlo usare dalla cassetta degli attrezzi, occorre salvarlo e chiudere la finestra di dialogo del modellatore in modo da consentire al sistema di aggiornare la configurazione.
Salvataggio e caricamento di modelli
Usate il pulsante [Salvataggio] per salvare il modello corrente ed il pulsante [Apri] per aprire un modello esistente. I modelli sono salvati con l’estensione .model. Se il modello è già stato salvato [dalla finestra del modellatore] non vi sarà chiesto il nome del file perchè esiste già un file associato al modello e verrà usato quello.
Prima di salvare un modello, dovete inserire un nome ed un gruppo per esso usando le caselle di testo nella parte alta della finestra.
Models saved on the models folder (the default folder when you are prompted for a filename to save the model) will appear in the toolbox in the corresponding branch. When the toolbox is invoked, it searches the models folder for files with .model extension and loads the models they contain. Since a model is itself an algorithm, it can be added to the toolbox just like any other algorithm.
The models folder can be set from the processing configuration dialog, under the Modeler group.
Models loaded from the models folder appear not only in the toolbox, but also in the algorithms tree in the Algorithms tab of the modeler window. That means that you can incorporate a model as a part of a bigger model, just as you add any other algorithm.
In some cases, a model might not be loaded because not all the algorithms included in its workflow are available. If you have used a given algorithm as part of your model, it should be available (that is, it should appear on the toolbox) in order to load that model. Deactivating an algorithm provider in the processing configuration window renders all the algorithms in that provider unusable by the modeler, which might cause problems when loading models. Keep that in mind when you have trouble loading or executing models.
Aggiornare il modello
Potete modificare il modello mentre lo state creando, ridefinendo il flusso e le relazioni fra gli algoritmi e i dati che definiscono il modello stesso.
Se premete il tasto destro del mouse su un algoritmo nel grafico che rappresenta il modello, apparirà un menu come quello sotto riportato:
Figure Processing 22:
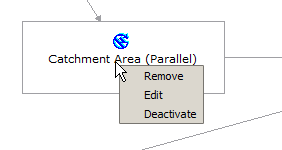
Modeler Right Click
Selecting the Remove option will cause the selected algorithm to be removed. An algorithm can be removed only if there are no other algorithms depending on it. That is, if no output from the algorithm is used in a different one as input. If you try to remove an algorithm that has others depending on it, a warning message like the one you can see below will be shown:
Figure Processing 23:
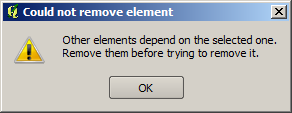
Cannot Delete Algorithm
Selezionando l’opzione Modifica o semplicemente premendo due volte sull’icona dell’algoritmo apparirà la finestra dei parametri dell’algoritmo in modo che possiate cambiarne i valori. Non tutti i valori disponibili nel modello appariranno in questo caso come dati disponibili. Layer o valori generati ad un passaggio successivo del flusso del modello che possono causare dipendenze circolari non saranno disponibili.
Selezionate i nuovi valori e premete il pulsante [OK] come al solito. La connessione fra gli elementi del modello cambieranno di conseguenza anche nel pannello grafico.
Abilitare e disabilitare gli algortimi
Gli algoritmi possono essere disattivati nel modellatore, così non saranno eseguiti quando il modello sarà lanciato. Questo può essere sfruttato per mettere a punto una parte del modello o quando non avete bisogno di tutti i risultati generati dal modello.
Per disattivare un algoritmo, premete il tasto destro del mouse sulla sua icona nel pannello grafico e spuntate l’opzione Disattivazione. Vedrete che ora l’algoritmo sarà presentato con un’etichetta rossa sotto il nome che indica che questo non è attivo.
Figure Processing 24:
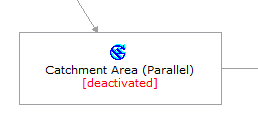
Deactivate
Anche gli algoritmi dipendenti (direttamente o indirettamente) da quell’algoritmo appariranno come disattivati in quanto non possono ora essere eseguiti.
Per abilitare un algoritmo basta premere sulla sua icona col pulsante destro del mouse e selezionare l’opzione Abilitare.
Informazioni ed aiuto per l’aggiornamento del modello
You can document your models from the modeler itself. Just click on the [Edit model help] button and a dialog like the one shown next will appear.
Figure Processing 25:
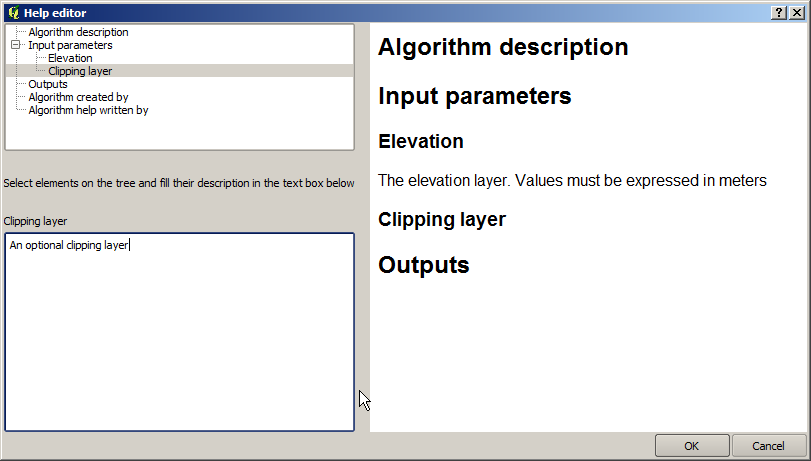
Help Edition
On the right-hand side you will see a simple HTML page, created using the description of the input parameters and outputs of the algorithm, along with some additional items like a general description of the model or its author. The first time you open the help editor all those descriptions are empty, but you can edit them using the elements on the left-hand side of the dialog. Select an element on the upper part and the write its description in the text box below.
L’informazione di aiuto del modello è salvata nella stessa cartella insieme al modello stesso. Non dovete preoccuparvi del suo salvataggio perchè è eseguito automaticamente.
A proposito degli algoritmi disponibili
Noterete che alcuni algoritmi che potete eseguire dalla cassetta degli attrezzi non appaiono nella lista di quelli disponibili quando state creando un modello. Per essere incluso in un modello, un algoritmo deve avere una semantica corretta, così come essere correttamente collegato con gli altri nel flusso di lavoro. Se un algoritmo non ha una semantica corretta (ad esempio, se il numero dei layer generati non può essere conosciuto anticipatamente) allora non è possibile usarlo all’interno del modello e quindi non può apparie nella lista di quelli che potere trovare nella finestra del modellatore.
Additionally, you will see some algorithms in the modeler that are not found in the toolbox. This algorithms are meant to be used exclusively as part of a model, and they are of no interest in a different context. The ‘Calculator’ algorithm is an example of that. It is just a simple arithmetic calculator that you can use to modify numerical values (entered by the user or generated by some other algorithm). This tools is really useful within a model, but outside of that context, it doesn’t make too much sense.
Saving models as Python code
Given a model, it is possible to automatically create Python code that performs the same task as the model itself. This code is used to create a console script (we will explain them later in this manual) and you can modify that script to incorporate actions and methods not available in the graphical modeler, such as loops or conditional sentences.
This feature is also a very practical way of learning how to use processign algorithms from the console and how to create new algorithms using Python code, so you can use it as a learning tool when you start creating your own scripts.
Save your model in the models folder and go to the toolbox, where it should appear now, ready to be run. Right click on the model name and select Save as Python script in the context menu that will pop-up. A dialog will prompt you to introduce the file where you want to save the script.